The Wizard3
Owner / Designer
Registered: 06-2006
Location: Castle Belgalor
Posts: 2201
Karma: 2 (+3/-1)
|
|
reply | quote
|
|
Secure your Home Network [Netgear] Steps 10-14
Step 10
Double-click the installation file, select the version of Windows that is being used and click Next before choosing ‘Download and install’ and clicking Next again. There will be a short pause while the required setup files are downloaded and installation begins.
Click Next, enter your name and email address, and click Next again.
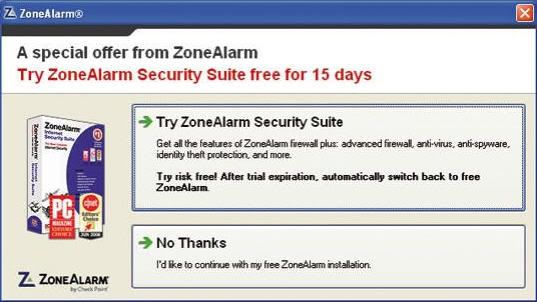
After agreeing to the licence terms, click Next and a few moments later ZoneAlarm will be installed – just click on Finish. Click Yes to launch the program and click No Thanks at the dialogue box that appears.
Step 11
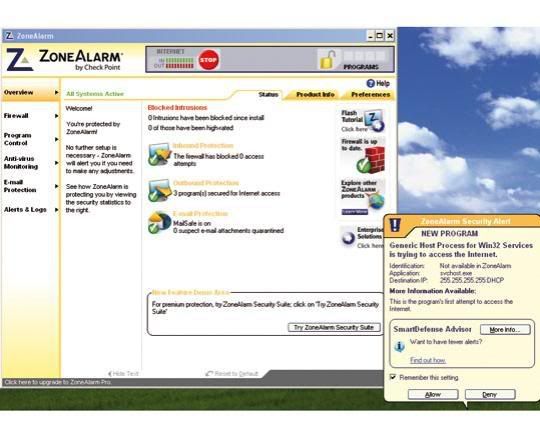
Make sure that the ‘Scan my computer’ option is selected and click on Next followed by Finish.
When prompted, click on OK to restart Windows and when the Windows Desktop reloads, click on Finish to hide the tutorial message.
To configure Zone Alarm, just use Windows as you normally would. Whenever a program attempts to connect to the internet or another computer attempts to communicate with yours, Zone Alarm will display a warning message. Tick the box labelled ‘Remember this setting’ and click the Allow or Deny button. In this way, it is possible to block unwanted connections.
Step 12
Now that a network has been correctly configured and properly secured, you can start sharing files and folders between computers.
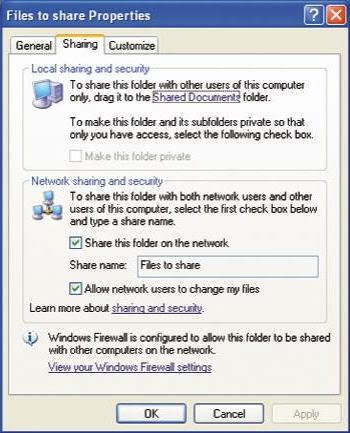
To do this in Windows XP, right-click a folder and select Sharing and Security. In the lower half of the dialogue, click the link to enable sharing without using a wizard, select ‘Just enable file sharing’ and click OK. Tick the box labelled ‘Share this folder on the network’ and enter a suitable name. If other computers are to be allowed to edit as well as view files, tick the box labelled ‘Allow network users to change my files’ and click OK.
Step 13
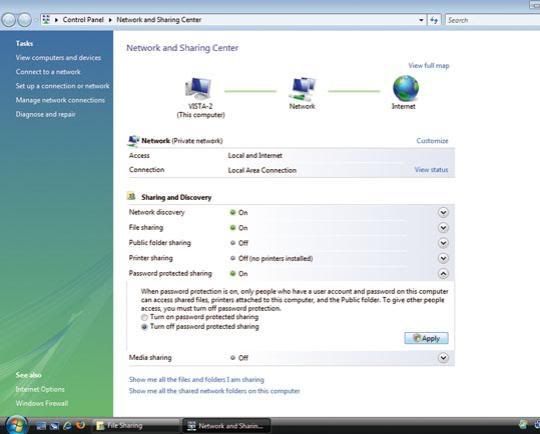
Luckily enough for me I have Vista installed on a computer in another room & Windows XP Pro which I use here at my desk. So, to share files in Vista, the process is very similar and can be achieved in one of two ways.
The first option is to right-click a folder and select the Share option. The dropdown menu can then be used to select which users should be allowed access to the folder. To allow users to connect without having to enter a username and password, click the link to visit the Network and Sharing Center and turn off ‘Password-protected sharing’. Shares can also be created by right-clicking, selecting Properties and clicking Advanced Sharing on the Sharing tab. After ticking ‘Share this folder’, permission settings can be configured.
Step 14
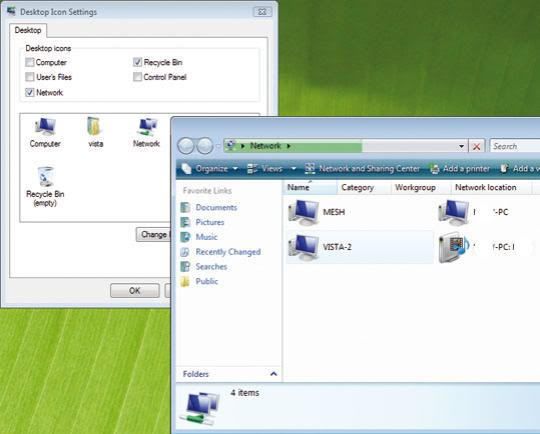
To make it easier to access shared files and folders quickly, a network icon can be added to the Windows Desktop.
In Windows XP, right-click the Desktop, select Properties, move to the Desktop tab and click Customize Desktop. Tick the box labelled My Network Places and click OK.
In Windows Vista, right-click on the Desktop, select Personalize and then click ‘Change desktop icons’ in the task pane to the right. Tick the Network box and click OK. Double-clicking the newly created icon will display a list of networked computers – double-clicking these icons will display a list of shared files.
The Wizard3, 9/1/09, 17:53
|
|
8/1/09, 21:05
|


|